Artekit PropBoard: LED API
LED API documentation for the Artekit PropBoard.
Introduction: The HBLED class
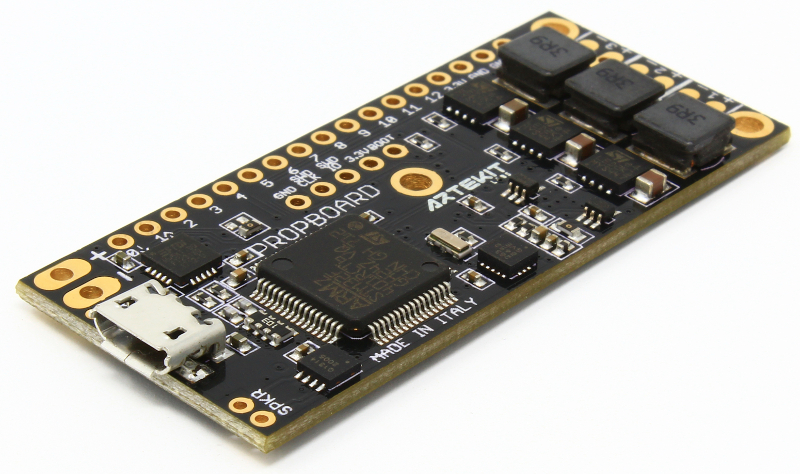
The PropBoard has 3 high-brightness LED drivers on board. You can manage each one of these LED drivers through the HBLED class.
class HBLED : public STObject
An HBLED object represents a High-Brightness LED. Start by instancing an HBLED object and stating on which output the high-brightness LED is connected to (currently 1, 2 or 3). Then call the HBLED::begin function and specify the LED’s maximum forward current (in milliamperes).
Example
HBLED redLed(1);    // a red LED connected to output 1
HBLED greenLed(2);  // a green LED connected to output 2
HBLED blueLed(3);   // a blue LED connected to output 3

void setup()
{
    // This red LED has a 700mA max. forward current.
    redLed.begin(700);

    // This green LED has a 750mA max. forward current.
    greenLed.begin(750);

    // This blue LED has a 1000mA max. forward current.
    blueLed.begin(1000);
}
It is important to know the maximum forward current of your LEDs. This information is available in your LED datasheet, for example, for a LED ENGIN LZ4-00MD00 RGBW LED with 700mA maximum forward current:

Usually the symbol for maximum forward current is If. Never use the values you find in the Absolute Maximum section of the datasheet (usually under titles like Absolute Maximum Ratings or Absolute Maximum Characteristics);
By specifying a maximum current to the HBLED class you can be safe knowing that your LED will never receive more current than the one you specify with the HBLED::begin function. If you call for the above example code redLed.setCurrent(10000) (10 amperes), all the functions will cap the output current to what originally was passed to the HBLED::begin function.
You don’t need to adjust the output current values when the battery drops. This is done automatically by the on-board LED drivers.
After this, you can start using your High-Brightness LED with any of the HBLED functions. Set the brightness with the HBLED::setValue and HBLED::setCurrent functions, or enable an effect with the HBLED::ramp, HBLED::shimmer and HBLED::flash functions.
HBLED::begin
Call the HBLED::begin function to initialize a High-Brightness LED output.
Syntax
bool begin(uint16_t current_mA);
Parameters
The current_mA parameter is the maximum forward current the LED can stand. Look for this value in your LED’s datasheet.
Returns
Returns true on success, false otherwise.
Example
See the example for HBLED.
HBLED::end
Call the HBLED::end to disable and de-initialize a High-Brightness LED output.
Syntax
bool end();
Parameters
None
Returns
Returns true on success, false otherwise.
HBLED::setCurrent
Set the brightness of an LED by setting a specific output current on the LED output.
Syntax
void setCurrent(uint16_t current_mA);
Parameters
The current_mA parameter is the current in milliampers. The current_mA value will be capped to the value specified to the HBLED::begin function.
Returns
None.
Example
HBLED blueLed(1);   // Blue LED on output 1

void setup()
{
    // Initialize the LED with a maximum forward current of 700mA
    blueLed.begin(700);
}

void loop()
{
    // Set the current to 250mA.
    blueLed.setCurrent(250);

    delay(1000);

    // Set the current to 700mA.
    blueLed.setCurrent(700);

    delay(1000);

    // Turn the LED off (zero current).
    blueLed.setCurrent(0);

    delay(1000);
}
HBLED::getCurrent
This function returns the actual current on an LED output.
Syntax
uint16_t getCurrent();
Parameters
None.
Returns
A value corresponding to the actual current, in millivolts.
HBLED::setValue
This function sets the brightness of an LED by setting a brightness-corrected current on the LED output given a specific value between 0 and 255.
The way we (humans) perceive luminance is not linear. For us, an LED set at half its maximum current doesn’t necessarily means that will be perceived at the half of its maximum brightness. This function corrects this relationship by converting a 0-255 value into non-linear current-regulated brightness.
Another good reason to use a value like brightness instead of current is that is “cross-LED” compatible: if you change your LEDs, you only need to change the maximum current value passed to HBLED::begin.
Syntax
void setValue(uint8_t value);
Parameters
The value parameter is a number between 0 and 255. When 0 is passed, the LED is turned off. When 255 is passed, the LED is at full brightness. Any value in-between will be corrected using a brightness table.
Returns
None.
Example
HBLED blueLed(1);   // Blue LED on output 1

void setup()
{
    // Initialize the LED with a maximum forward current of 700mA
    blueLed.begin(700);
}

void loop()
{
    // Set the maximum brightness
    blueLed.setValue(255);

    delay(1000);

    // Set half brightness
    blueLed.setValue(127);

    delay(1000);

    // Turn the LED off
    blueLed.setValue(0);

    delay(1000);
}
HBLED::getValue
This function returns the current value.
Syntax
uint8_t getValue();
Parameters
None.
Returns
A value between 0 and 255 corresponding to the last set value.
HBLED::ramp
This function produces a linear, brightness corrected, ramp-up or ramp-down on an LED output.
Syntax
void ramp(uint8_t start, uint8_t end, uint32_t duration);
Parameters
The start parameter is the start value of the ramp. It is a number between 0 and 255 corresponding to the desired brightness (0 for LED off, 255 for maximum brightness).
The end parameter is the end value of the ramp. It is a number between 0 and 255 corresponding to the desired brightness (0 for LED off, 255 for maximum brightness).
The duration parameter is the total duration (in milliseconds) of the ramp effect.
Returns
None.
Notes
If the start parameter is lower than the end parameter, a ramp-up effect is produced. If the end parameter is lower than the start parameter, a ramp-down effect is produced.
The function is asynchronous. This means that the function returns immediately and your program keeps running while the effect is processed in the background.
To know when the effect has ended, poll the status with the HBLED::withEffect function.
To stop the effect you can:
- Start another effect.
- Set a new value with the
HBLED::setValueorHBLED::setCurrentfunctions. - Call the
HBLED::stopEffectfunction. Note that by calling this function the LED will keep the latest set value.
Example
HBLED myBlueLed;

void setup()
{
    // Initialize an LED with 700mA maximum forward current.
    myBlueLed.begin(700);

    // Start a ramp effect from OFF to maximum brightness
    // with a total duration of 1 second.
    myBlueLed.ramp(0, 255, 1000);

    // Poll to know when the effect has ended
    while (myBlueLed.withEffect());

    // Ramp down from maximum brightness to half brightness
    // with a total duration of 500ms
    myBlueLed.ramp(255, 127, 500);

    // Program continues
}
HBLED::shimmer
This functions produces a shimmering effect on an LED output. Shimmering is defined with a minimum and maximum brightness values, and can it be:
- linear: the brightnes increments and decrements back and forth between the minimum and maximum brightness values with a given frequency.
- random: a brightness value is randomly chosen between the minimum and maximum brightness values with a given frequency.
Syntax
void shimmer(uint8_t lower, uint8_t upper, uint8_t hz, bool random);
Parameters
The lower parameter is a number between 0 and 255 representing brightness (0 for LED off, 255 for maximum brightness). It is the lowest value the shimmering effect will use.
The upper parameter is a number between 0 and 255 representing brightness (0 for LED off, 255 for maximum brightness). It is the highest value the shimmering effect will use.
The hz parameter is the frequency in Hz.
If random is true it will be picked a random value between lower and upper at the frequency specified with the hz parameter. If random is false, the function will produce linear brightness increment-decrement cycles between lower and upper values at the frequency given by the hz parameter.
Returns
None.
Notes
The function is asynchronous. This means that the function returns immediately and your program keeps running while the effect is processed in the background.
To stop the effect you can:
- Start another effect.
- Set a new value with the
HBLED::setValueorHBLED::setCurrentfunctions. - Call the
HBLED::stopEffectfunction. Note that by calling this function the LED will keep the latest set value.
Example
HBLED myBlueLed;

void setup()
{
    // Initialize an LED with 700mA maximum forward current.
    myBlueLed.begin(700);

    // Start a shimmering effect from half-brightness to maximum brightness
    // with a frequency of 25Hz.
    myBlueLed.shimmer(127, 255, 25);

    // Wait a little
    delay(5000);

    // Stop the effect by turning the LED off
    myBlueLed.setValue(0);

    // Program continues
}
HBLED::flash
This function generates cyclic flashes on an LED output, with a minimum and maximum brightness and with a given frequency and duration.
Syntax
void flash(uint8_t on, uint8_t off, uint8_t hz, uint32_t duration);
Parameters
The on parameter is a number between 0 and 255 representing brightness (0 for LED off, 255 for maximum brightness). It is the brightness value of the LED in the logic “on” state.
The off parameter is a number between 0 and 255 representing brightness (0 for LED off, 255 for maximum brightness). It is the brightness value of the LED in the logic “off” state.
The hz parameter is the frequency in Hz.
The duration parameter is the duration in milliseconds. If duration is zero, the duration is infinite.
Returns
None.
Notes
The function is asynchronous. This means that the function returns immediately and your program keeps running while the effect is processed in the background.
If the duration is not infinite, you can poll the effect status with the HBLED::withEffect function.
To stop the effect you can:
- Start another effect.
- Set a new value with the
HBLED::setValueorHBLED::setCurrentfunctions. - Call the
HBLED::stopEffectfunction. Note that by calling this function the LED will keep the latest set value.
Example
HBLED myBlueLed;

void setup()
{
    // Initialize an LED with 700mA maximum forward current.
    myBlueLed.begin(700);

    // Start a flashing effect from 100 to 200
    // with a frequency of 25Hz and 10 seconds duration
    myBlueLed.flash(100, 200, 25, 10000);

    // Wait for effect to finish
    while (myBlueLed.withEffect());

    // Start a flashing effect from 0 to 255
    // with a frequency of 20Hz and infinite duration
    myBlueLed.flash(0, 255, 20, 0);

    // Program continues
}
HBLED::withEffect
Call this function to know if an HBLED object is executing an effect (ramp, flash, shimmer).
Syntax
bool withEffect();
Parameters
None.
Returns
Returns true if the HBLED object is executing an effect, otherwise it returns false.
HBLED::stopEffect
Call this function to stop an ongoing asynchronous effect (ramp, flash, shimmer).
Syntax
void stopEffect();
Parameters
None.
Returns
None.
Notes
When the effect stops, the LED output will keep the latest value set by the effect.
HBLED::setMultiplier
Call this function to set a multiplier to be used every time a value is set to an LED. The multiplier modifies the final brightness of the LED.
Syntax
float setMultiplier(float multp);
Parameters
The multp parameter is a floating point value from 0 to 1. If a value higher that 1 is passed, it will be set as 1. If a value lower than 0 is passed, it will be set at 0.
Returns
A floating point with the previous multiplier value.
Notes
The multiplier of the HBLED object has a default value of 1. If the function is called when there are no effects executing on the HBLED, then the value of the LED will be automatically updated to reflect the new multiplier.
Example
Use this function to modify on-the-fly the behavior of a given effect. For example, you can use HBLED::setMultiplier to generate a ramp while shimmering:
HBLED blue(1);

void ledRampUp(uint32_t duration)
{
    // Set multiplier to 0
    blue.setMultiplier(0);

    // Start shimmering. Since the multiplier is 0,
    // the LED will remaing OFF.
    blue.shimmer(0, 75, 255, 1);

    // Calculate the increment for a given duration
    float steps = 1.0f / duration;
    float mult = 0;

    // Slowly increase the multiplier. The LED
    // will keep shimmering while increasing
    // brightness.
    while (duration)
    {
        mult += steps;
        blue.setMultiplier(mult);
        duration--;
        delay(1);
    }
}
HBLED::getMultiplier
Call this function to retrieve the current multiplier value.
Syntax
float getMultiplier();
Parameters
None.
Returns
A floating point with the current multiplier value.